> ## Documentation Index
> Fetch the complete documentation index at: https://developers.e-cross.tech/llms.txt
> Use this file to discover all available pages before exploring further.
# Store setup
> Connect your Shopify backoffice store to e-CROSS
## e-CROSS Shopify app installation
First thing you need to do is install the e-CROSS Shopify App in your Shopify store.
To do so, access the [e-CROSS Shopify App](https://apps.shopify.com/e-cross-freight-tax?st_source=developers\&surface_detail=developers) in the Shopify App Store and install it.
## e-CROSS Shopify app configuration
Access the e-CROSS Shopify app configuration page in your Shopify store, select "Store type = Backoffice" and save the configuration.
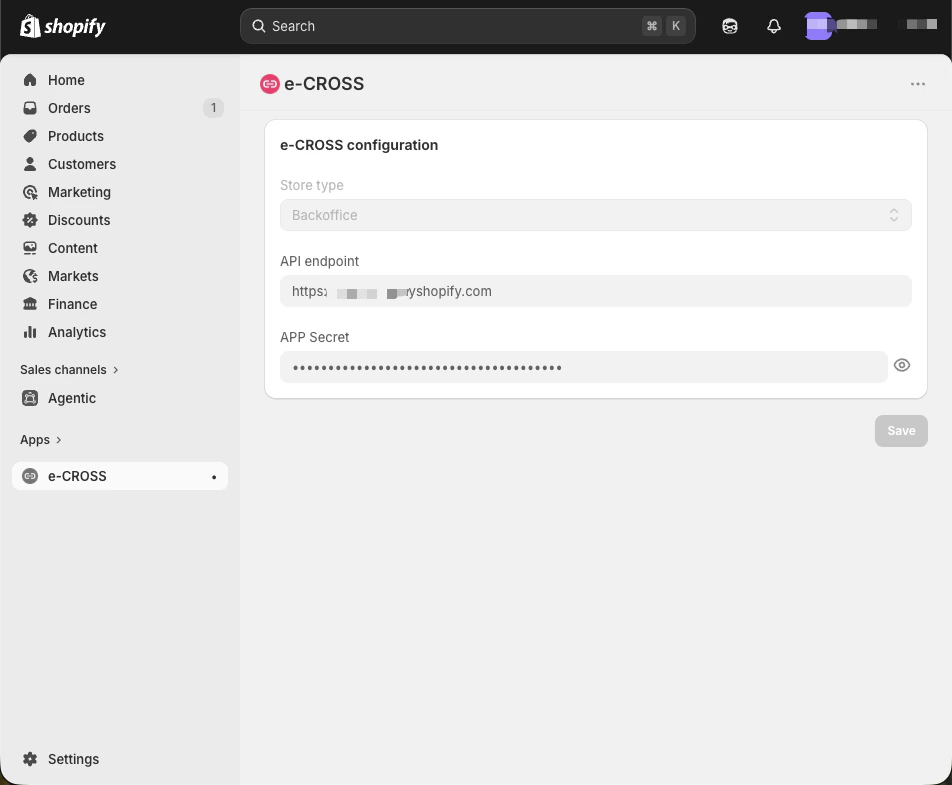 After that, share the API Endpoint and APP Secret with your e-CROSS onboarding point of contact to complete the setup on the e-CROSS platform.
## Select which products to sync
By default, no product is automatically synced to e-CROSS. To sync a product you need to add a tag to the product.
The tag must use this format:
```text theme={null}
merchantId:
```
The `` value is the merchant ID of your account in e-CROSS. If you don't know it, ask your e-CROSS onboarding point of contact.
After that, share the API Endpoint and APP Secret with your e-CROSS onboarding point of contact to complete the setup on the e-CROSS platform.
## Select which products to sync
By default, no product is automatically synced to e-CROSS. To sync a product you need to add a tag to the product.
The tag must use this format:
```text theme={null}
merchantId:
```
The `` value is the merchant ID of your account in e-CROSS. If you don't know it, ask your e-CROSS onboarding point of contact.